
 |
|
Site: News/Home CNC Guild Forums Submissions Contact Staff Downloads: Voxels: Aircraft Ground Naval Voxel Comp ´06 SHPs: Infantry Buildings Animation Other Icons: Packs Buildings Armored Infantry Maps: RA2 Mp maps RA2 Sp maps YR Mp maps YR Sp maps Other Other: paFileDB GFX Packs TSGFX Packs Tutorials Utilities Mods Sounds Recommended Downloads: Ares |
 |
Make a Cameo for RA2 using Masks (PSP)
Submitted by ArgCmdr
You
might have seen tutorials like this one before, as many people made these.
Well, im now one more of them, since the other cameo tutorial here avoids
the use of masks (so this one is made so you have a second choice, if you
understand masks use, you go ahead with this one, else the other makes consistent
cameos as well, just not as good as the ones achieved with this one)
First off, download this mask. Its a png
file, which containing a single layer, in 16 million colors.
Then, you will have to open up the Layer Palette (In case you dont know where
it is, right-click on any toolbar, and select Layer Palette.
After that, Right-Click in Background, and click on Duplicate
Select the Background layer, and press delete on your keyboard.
Now, having the background layer selected, open up your base image, resize
it to 60x48 if it wasnt that size, and if the image is in correct proportion
according to your judgement, copy it.
Now, back to the mask.png file, paste the image onto the Background layer.
You will notice its invisible, this is because there is no mask yet, the duplicated
layer is "full".
Here is when you should make the mask. Select Layer 1. Click on Masks, then
on New, then on From Image...
As options, select: This Window (Dropbox that gives source window as caption),
Create Mask From: Source Luminance, and uncheck Invert Mask Data. Click on
OK ***
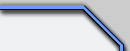
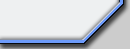
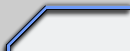
Almost done, see? A bevel effect has been applied to the image, consitant
with RA2 as the mask is actually an empty icon from the game.
Now all you have to do, is apply cameo.pal (Colors ---> Load Palette --->
Look for cameo.pal on the Load Palette window), then make the shaded bottom
lines (Select the downmost 7 horizontal pixel lines, paste as new image, go
to Colors ---> Adjust ---> Hue/Stauration/Lightness, and just change
Lightness to -20. Repeat three times this procedure. Then copy the result,
and paste it back into the original place it was.
After that, you just need to make the corners be index 0 blue, that is paint
the pixels at the coordinates 0,0 ; 0,1 ; 1,0 ; 58,0 ; 59,0 ; 59,1 ; 0,46
; 0,47 ; 1,47 ; 58,47 ; 59,47 & 59,46, with the first colour in the palette
(RGB 255,0,0)
Then save the file as a pcx, named XXXX 0000.pcx, where XXXX is the name of
the file (future SHP file and ID for reference in art.ini, usually a four
letter abbreviation followed by ICON or UICO -veteran version-, eg. MTNKICON,
MTNKUICO), and proceed to convert to SHP (TS) with XCC Mixer.
That should be it, a perfectly consitant cameo for your use.
*** Note: This step may have different options in further versions of PSP
or previous one. These are the options displayed in PSP 6.01, program used
for the construction of this tutorial.
|
|
Favourites: Ares Mental Omega raminator CnC Sleipnir's Stuff Wagnerma.de Webmaster: Nighthawk Affiliates: CNC Guild Project Perfect Mod CNC Source Sudden Strike C&C Reloaded Revora Frontpage Revora Hosting |

|